How to Enable USB Port in Windows 10/11
Almost every office environment today works with USB ports for connecting peripherals (e.g., keyboards, flash drives, external hard drives).
But in some shared office computers, the administrator or Group policy may block USB ports due to security concerns. USB ports can be blocked or disabled via BIOS/UEFI settings, registry settings, or the computer’s device manager.
Fortunately, it’s easy to resolve this issue. In this article, we provide a clear walkthrough on how to enable USB port in Windows 10/11 machines.
In some cases, USB ports may genuinely malfunction, and will not work whether they’re enabled or not. In that case, check out our article on USB ports not working to troubleshoot them.
- How to Enable USB Ports in Windows 10/11 via Device Manager
- How to Enable USB Port Using CMD (Windows 10/11)
- Enable USB Port in Windows 10/11 Using Registry Editor
- How to Enable USB Blocked by Group Policy Windows 10/11
- Enable USB Port in BIOS / UEFI
- How to Enable USB Port in Windows 11 Blocked by Administrator
- Using USB Network Gate as a Workaround for Blocked USB Ports
Pre-tip: Check If the USB Port Is Physically Disabled
Do not immediately perform technical adjustments if the problem occurs.
- Determine first if you have a USB port disabled at the hardware level.
- If it is, try to plug in the device into another port.
- If the problem persists, test the USB device on another computer or check if the port has any physical damage.
If these recommendations fail, proceed with our suggestions below.
How to Enable USB Ports in Windows 10/11 via Device Manager
If your USB port blocking issue is due to faulty manual configurations or driver issues, your computer’s Device Manager can easily re-enable the ports. Since this approach is GUI-based, it is highly accessible for casual users. The steps below are recommended to troubleshoot, diagnose, and fix USB connectivity problems.
Re-Enable USB Ports Via Device Manager
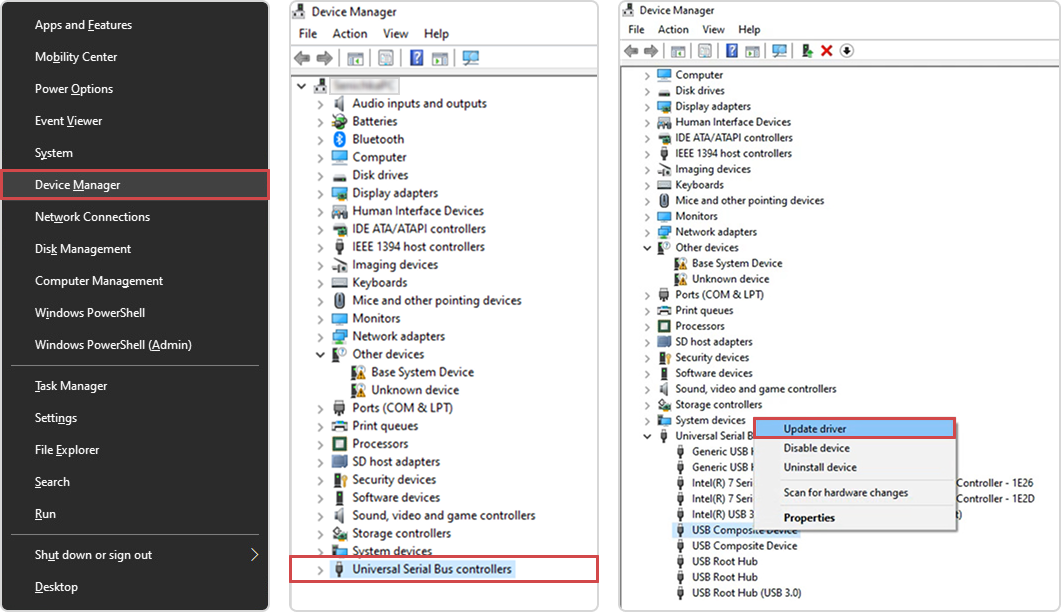
- Press Win + X, then choose Device Manager.
- Expand Universal Serial Bus controllers.
- Right-click any disabled item and select Enable. If you opt to right-click and choose “Update driver,” the issue might be resolved.
Note: In Windows 11, the Device Manager is also accessible via Settings > Bluetooth & devices > Devices > More Devices Settings.
Pros:
- Doesn’t require advanced technical knowledge
- Foolproof and reversible procedure
Cons:
- Ineffective if the USB blocking is policy-based
How to Enable USB Port Using CMD (Windows 10/11)
Another tool that can restore USB functionality is Command Prompt or CMD. Some prompts or commands can “edit” the registry directly and change the startup type of the USB storage driver that will enable the detection of USB devices.
This method is useful for IT professionals who manage systems via remote connection and automation. However, it requires caution and admin rights to avoid disruptions in USB connectivity.
How to Restore USB Port Functionality Using CMD
- Launch CMD as an administrator. To do this, click “Start” and type “cmd”, then right-click and select “Run as administrator.”
- Input this command:
HKLM\SYSTEM\CurrentControlSet\Services\USBSTOR /v Start /t REG_DWORD /d 3 /f - Press Enter and restart your PC.
Pros:
- Fast and scriptable
- Doesn’t require GUI access
Cons:
- Risk of command error if mistyped
Enable USB Port in Windows 10/11 Using Registry Editor
If Group Policy is unavailable (such as on Windows Home editions), a modification in the USBSTOR registry key can re-enable USB ports. A correct edit in the registry can restore the USB driver service promptly and reactivate device recognition.
Note: This method may not affect other USB device types like printers or keyboards.
This is recommended for experienced users who are well-versed with the Windows Registry Editor.
How to Enable USB Port via Registry Editor
- Open the Windows Registry Editor by pressing Win + R, typing regedit, then pressing Enter.

- Next, navigate to:
HKEY_LOCAL_MACHINE\SYSTEM\CurrentControlSet\Services\USBSTOR - On the right pane, double-click Start and set the value to 3.
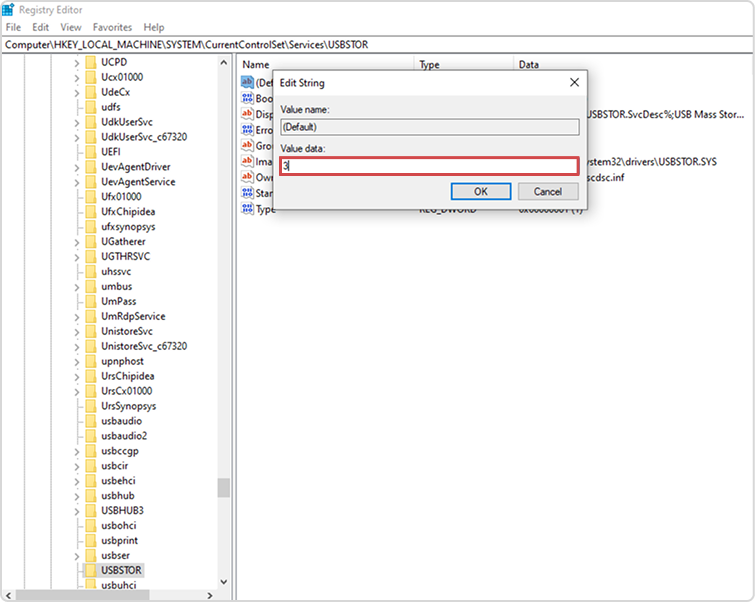
- Once set, click OK and restart your computer.
Note: In Windows 11, you can also use the Start Menu’s search functionality to open Registry Editor. The process remains as the one discussed above.
Pros:
- Gains precise control over USB devices
- Compatible with both Windows 10 and 11 systems, including Home editions that lack Group Policy access
Cons:
- Incorrect registry modification may cause system instability.
How to Enable USB Blocked by Group Policy Windows 10/11
This method unblocks USB storage devices through an edit in the Group Policy settings. While this approach is typically adopted by IT professionals, users of Windows Pro or Enterprise editions can also apply this fix.
How to Check and Enable USB Ports Blocked by Group Policy
- Press Win + R, type gpedit.msc, and hit Enter.

- Go to: Computer Configuration > Administrative Templates > System > Removable Storage Access
- Find these policies:
All Removable Storage classes: Deny all access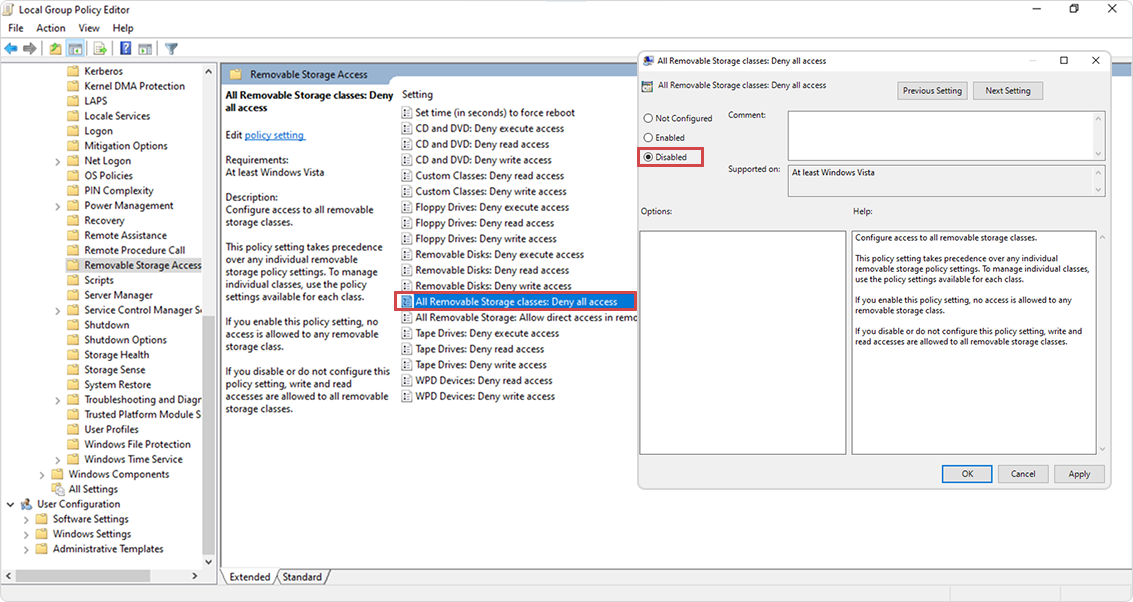
Removable Disks: Deny read/write access
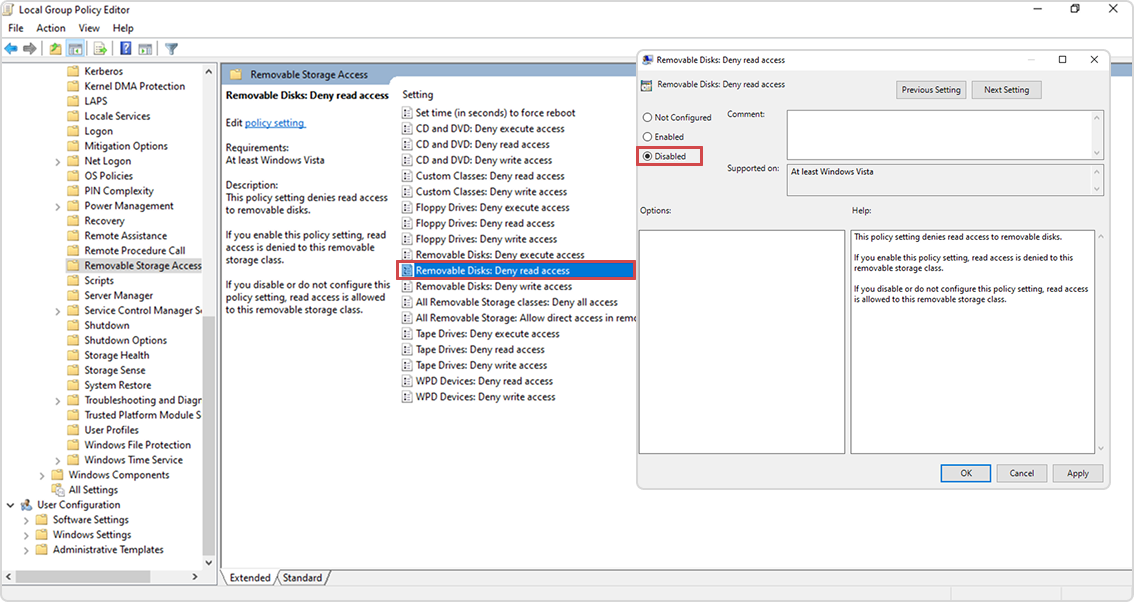
- Double-click each policy and choose Disabled or Not Configured.
- To save changes, click “Apply” > “OK.”
Pros:
- Permanent fix
- Works at system level
Cons:
- Not available on Windows Home editions
Enable USB Port in BIOS / UEFI
In some cases, a motherboard disables USB ports at the firmware level as a safeguard against boot-time threats or unauthorized access.
When this occurs, you must access the BIOS/UEFI settings and restore USB functionality before Windows loads. This solution may fix a blocked USB that is outside the operating system. Thus, this method is especially recommended for users whose USB ports are disabled during OS pre-boot.
How to Turn On USB Ports in BIOS / UEFI (Firmware-Level Fix)
- Boot your PC and press DEL/F2/ESC to enter BIOS.
- Look for Advanced Settings > USB Configuration.
- Check if the USB Ports or Legacy USB Support is enabled.
Note: BIOS interfaces vary by manufacturer. So, refer to your PC or motherboard manual if you cannot see similar options. In Windows 11, the BIOS/UEFI settings are more streamlined through Settings > System > Recovery Menu, but the process is similar to Windows 10.
Pros:
- Resolves blocked USB ports at the hardware level
Cons:
- A High-risk procedure; misconfiguration can affect the system’s operation.
How to Enable USB Port in Windows 11 Blocked by Administrator
Say you receive a notice like “Access Denied” or “Your USB device is not recognized”, it is possible that an administrator (e.g. in a work or school environment) has blocked the ports. In this case, you may have restricted access in Group Policy, Registry, and System Permissions.
The solutions below are recommended for users who want to diagnose and discover workarounds for admin-based USB restrictions.
What to do When USB Ports Are Blocked by the Administrator ?
You need to check the following first if you suspect an admin restriction:
- Group Policy Editor: Determine if you have access to gpedit.msc.
- Registry Settings: Refer to the article’s Section 5 to check your registry settings.
- User Privileges: Run CMD and enter whoami /groups to check if you are part of the Administrators group. If not, you may need to request access from your system admin.
Pros:
- Centralizes administrator-related solutions
- Explains limitations clearly
Cons:
- Not actionable without admin privileges
Another solution is to consider third-party alternatives like USB Network Gate to bypass the restriction.
Using USB Network Gate as a Workaround for Blocked USB Ports
USB Network Gate is a clever workaround if your USB ports are disabled by Group Policy, or blocked by an administrator. It can re-enable the ports and let your machine access USB devices such as flash drives, printers, or cameras.
This software lets you share a USB device over a network from a computer with unblocked USB ports. It will enable device access via remote connection on a machine where the USB ports are disabled or blocked, even without requiring local reactivation.
For this reason, USB Network Gate works with all types of users, including casual users, IT professionals, VM users, and remote workers.
Here’s a sample scenario:
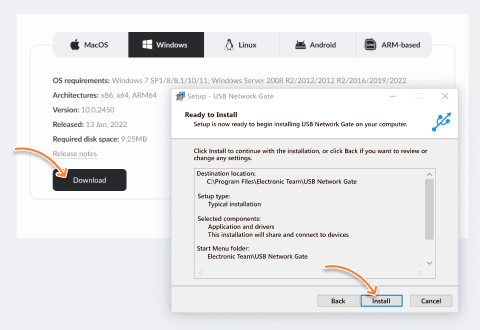
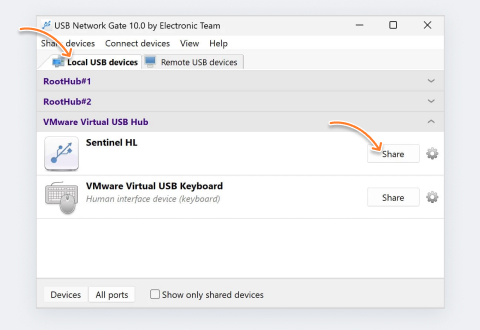
- On Computer A (with working USB ports), you plug in the USB device. Afterward, you install USB Network Gate and share the device over IP.
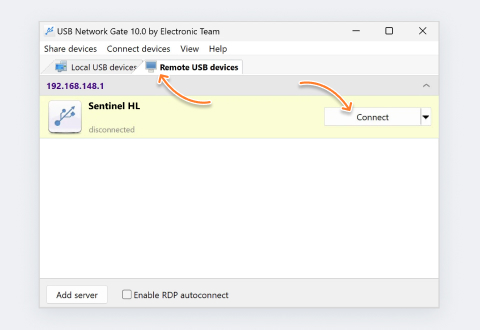
- On Computer B (where USB is blocked), you connect to that shared device using USB Network Gate. Now, it behaves just like it's plugged in locally, even if the physical ports on Computer B are disabled.
