Cookie
Electronic Team uses cookies to personalize your experience on our website. By continuing to use this site, you agree to our cookie policy. Click here to learn more.

How to fix the problem of Remote Desktop USB not working

Olga Weis Olga Weis Jul 8, 2021

COVID-19 had a major impact on how people manage and prioritize their work. This is because remote work environments are more common than ever before thanks to quarantining and social-distancing guidelines.

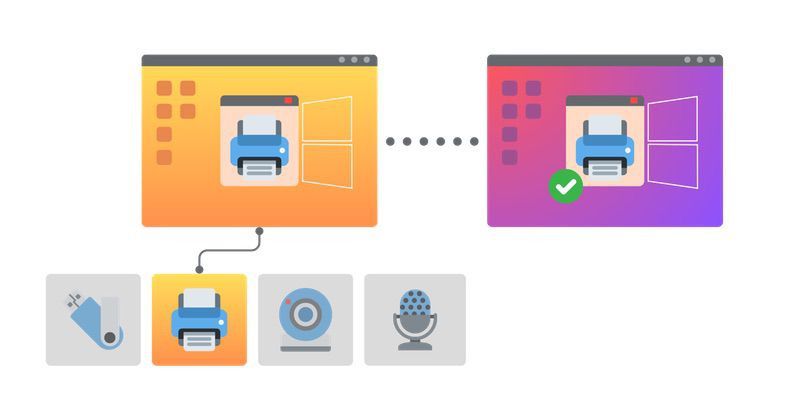
For companies with teams that rely heavily on remote desktop access to perform their daily tasks, it can pose a challenge to establish the USB for remote desktop connections.

For those struggling with the problem of remote desktop USB redirection not working, check below for the detailed checklist that will help you fix this issue.

Remote Desktop USB Redirection Not Working Option 1: Configuring Remote Desktop Connection

It can be frustrating when dealing with an RDP USB not working, but here’s how to fix it and get back to work.

The first and most important step to fix the RDP USB redirection not working is ensuring whether the Remote Desktop Connection Manager is configured properly.

If the Remote Desktop Manager is not configured correctly, devices won’t be accessible.

When faced with a Remote Desktop USB redirection not working, follow the steps below to check your Remote Desktop Connection Manager:

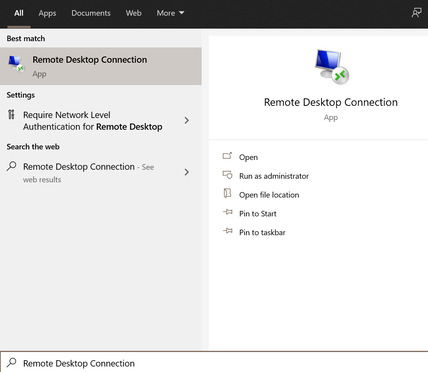
  1. Choose Remote Desktop Connection. open remote desktop connection
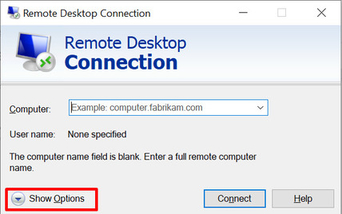
  2. In the Remote Desktop Connection window, expand the Show Options menu (as shown below). remote desktop show options
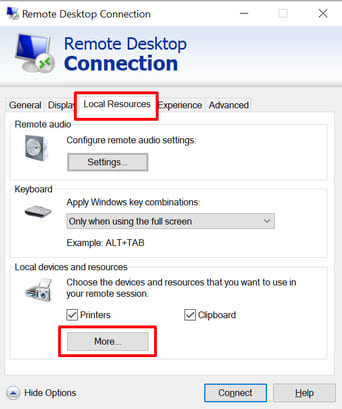
  3. While in the Options window, navigate to the Local Resources tab and then click More. remote desktop local resources
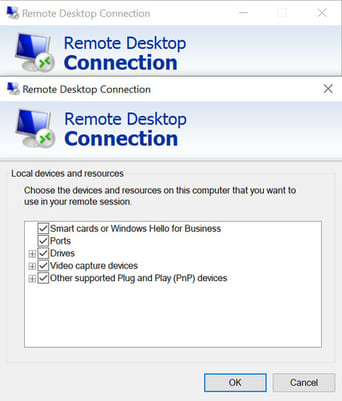
  4. Check the boxes that are relevant to the device(s) users wish to access via remote desktop session and click OK. remote desktop usb not working
Remote Desktop USB Redirection Not Working Option 2: Adjusting Remote Access Settings

If the remote desktop is still not seeing a USB device, the user may need to provide permission to the specified accounts that have authorized access (thus allowing a remote machine to connect to the device).

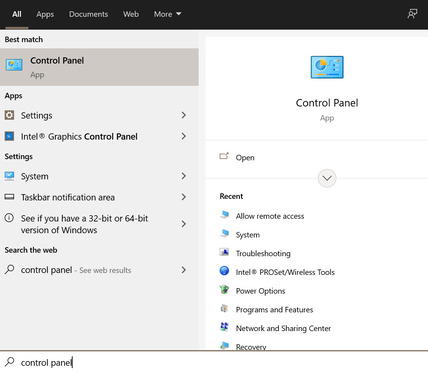
  1. Navigate to the Control Panel using the search bar. control panel
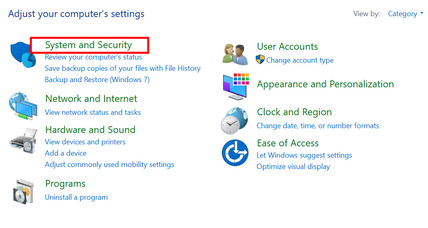
  2. In the Control Panel window, select Systems and Security. system and security
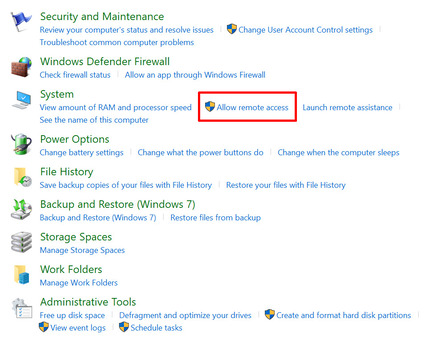
  3. Under the System tab, click the Allow remote access text (as shown below). allow remote access
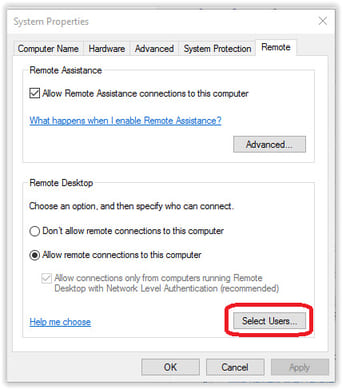
  4. Open the Remote tab and click the Select Users button in the Remote Desktop section. allow users remote desktop
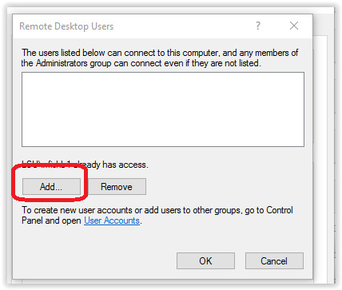
  5. Click the Add button when the System Properties box appears. add remote desktop users
  6. Finally, click OK.
logo USB Network Gate
#1 at Networking
USB Network Gate
Share USB over Ethernet on Windows
4.7 rank based on 72 + users
Get a download link for your desktop
Submit your email address to get a link for quick download on your desktop and get started!
or