Electronic Team uses cookies to personalize your experience on our website. By continuing to use this site, you agree to our cookie policy. Click here to learn more.

VirtualBox USB Passthrough Linux Tutorial

Editorial Team Editorial Team Aug 21, 2023

Are you wondering how to connect USB to VirtualBox Ubuntu when VirtualBox can’t locate any USB devices within a Linux Host? This is a frequent challenge many Linux distros users face (this is especially true regarding distros that are Debian-based: Linux Mint, POP OS, Ubuntu, and so on...)

VirtualBox USB Linux over ethernet (and other network) issues occur because VirtualBox can’t locate USB devices (or their folders) connected with the host operating system (even if vboxusers have completed all VirtualBox Extension Packs installation.)

Sometimes a VMDK file needs to be created for certain devices... but there are other solutions, as well.

Contents

  1. VBox USB Ubuntu passthrough with the software
  2. VirtualBox USB Linux native solution
  3. Access The USB In Oracle VM Virtualbox Ubuntu - third solution

In this article, we’ll discuss two specific Ubuntu VirtualBox USB solutions to show you how to connect USB to VirtualBox Linux... even if you’re a vboxuser who downloaded and completed VirtualBox Extension Packs installation- and still have issues. We’ll also answer the question: How do I access the USB in Oracle VM VirtualBox Ubuntu?

Solution Number 1: VirtualBox USB Passthrough Linux with the third-party app

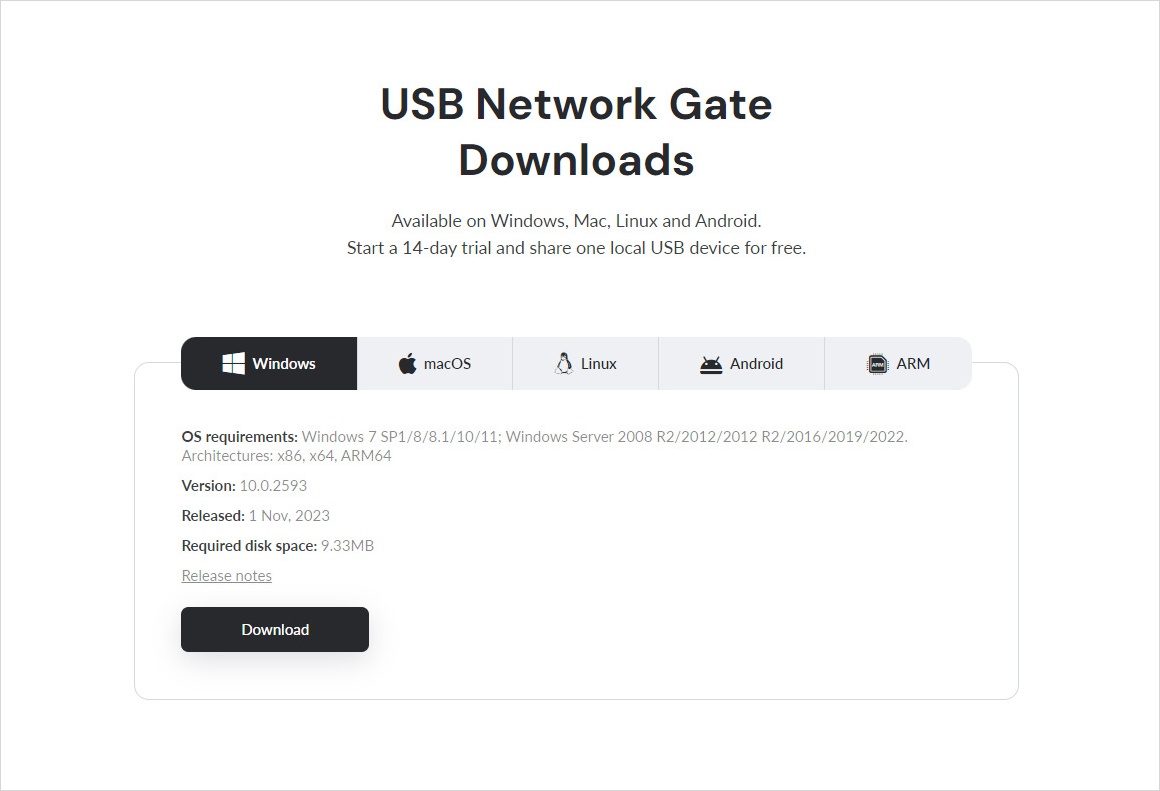
The ideal solution to enable Ubuntu VirtualBox USB passthrough is to use USB Network Gate. USB Network Gate is a reliable cross-platform software option that is loved by many when it comes to numerous USB passthrough situations.

For example, USB Network Gate easily resolves the question of: “How do I mount a USB drive in VirtualBox Ubuntu over ethernet connection?”

Follow the steps below to access USB hardware in VirtualBox:

1
Download and install USB Network Gate
 install usb network gate
2
On the machine physically connected with the USB device, install USB Network Gate
3
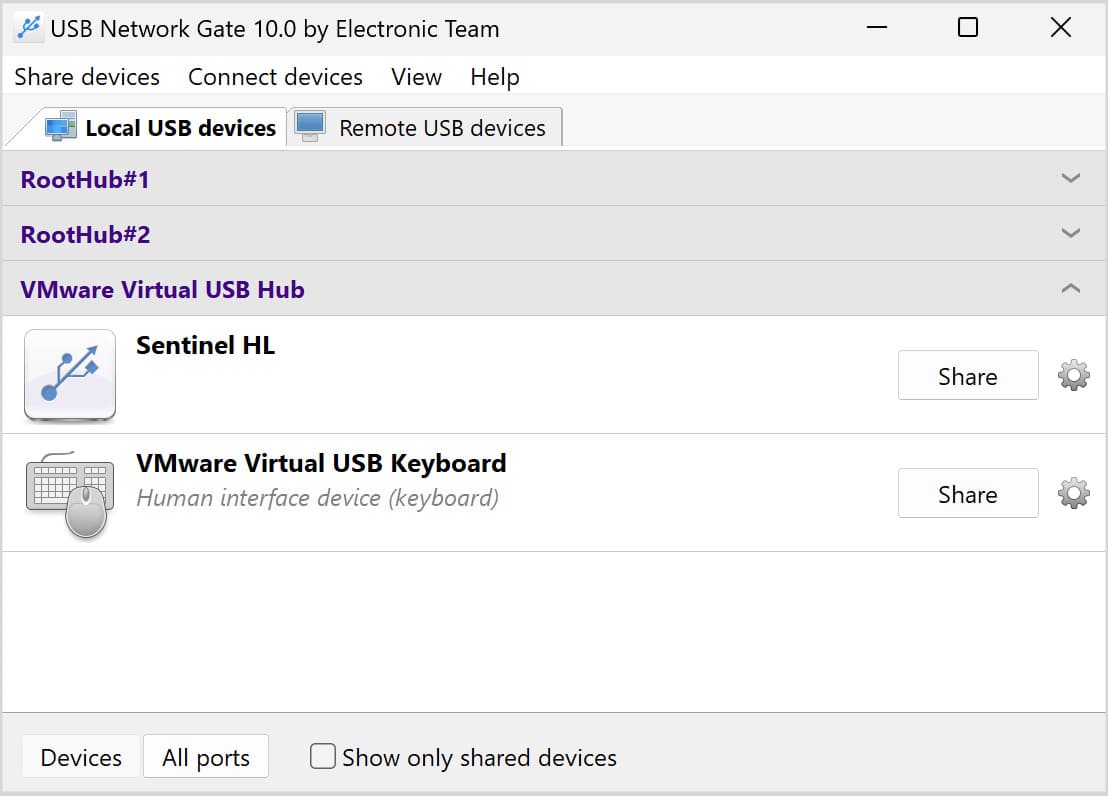
From within the USB Network Gate app GUI, locate and share the USB device (note: run the lsusb Linux command to learn more information about your specific USB bus)
 share the USB device
4
Install USB Network Gate on the Virtual Machine
5
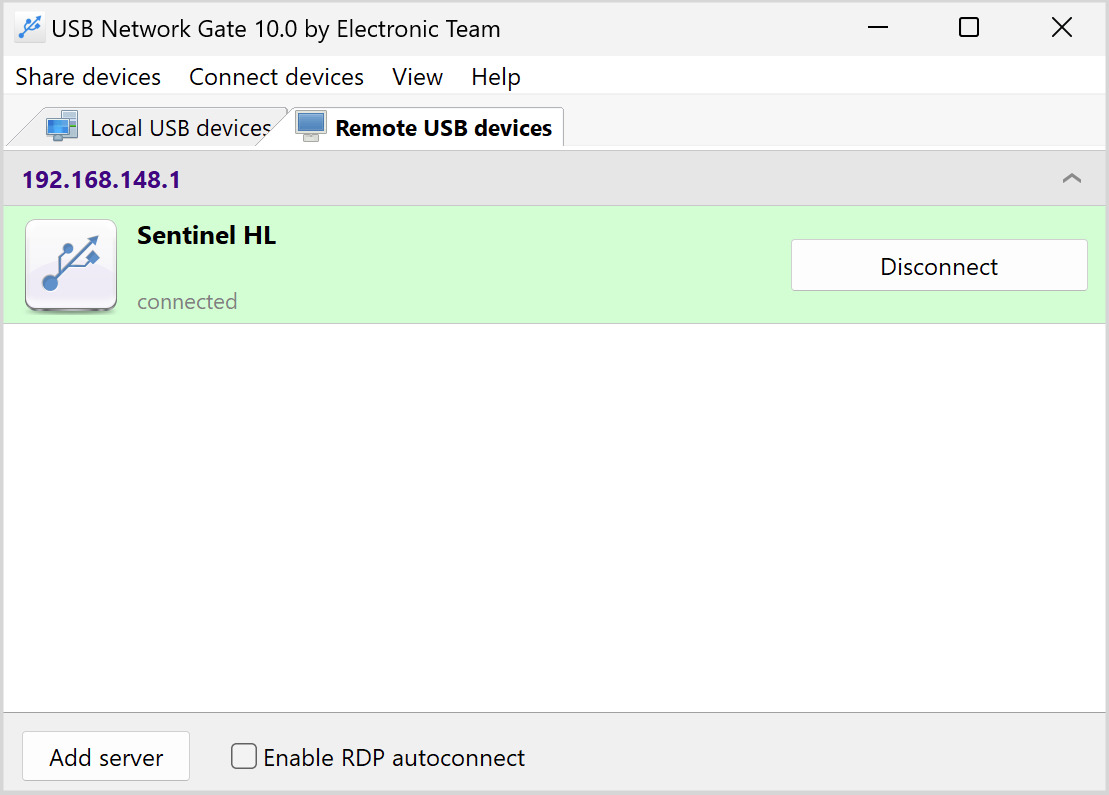
Run USB Network Gate from the VM, and connect to the (already) shared USB device in VirtualBox
 Share USB device (Windows version)

USB Network Gate is a beloved VirtualBox USB Linux software solution because it works across multiple platforms. Compatible (and cross-compatible) with: Mac, Linux, and Windows operating systems.

Solution Number 2: VirtualBox USB Passthrough Linux

While on the Virtual Machine, install VirtualBox Guest Additions.

Prior to creating and installing a new “guest” machine, users must install the Guest Addition Tool on the VM. Guest Additions contain utilities that improve the VMs operating systems, while simultaneously enhancing the machine-management experience. Guest machines won’t perform as desired if the Guest Additions Tool isn’t installed.

Devs and those new to Ubuntu should note: Vboxusers only need to mount the Guest Addition Tool CD and install the executable file when on a Windows VM. In other words: it isn’t necessary to install extra software/packages.


Learn how to install the Guest Additions Tool on a Ubuntu (or Windows) guest computer below...

How Do I Mount A Usb Drive In Linux Virtual Machine? How To Install Virtualbox Guest Additions On Ubuntu 18.10 / 18.04 | 16.04 LTS

Step 1: Begin by granting User Account Rights to Mount

Step 2: Once the VirtualBox Guest Additions Tools is installed on the VM, open the Ubuntu command terminal on the guest computer

Note: To see a list of all registered VMs, use the VboxManage command on Linux


Step 3: Run the command shown below (but please note this only works on Ubuntu)

sudo adduser $USER vboxsf

Users should then see the output shown below:

Output:
Adding user `richrd' to group `vboxsf' ...
Adding user richrd to group vboxsf

That’s it!

Step 3.1: If this previous command fails, try running the following command

sudo usermod -aG vboxsf $USER

Step 4: Shutdown the guest computer

Access USB device in Virtual Machine
14-day free trial

Mounting the external USB drive

Once VirtualBox Guest Additions Tool installation is complete (and the user account is added to the VirtualBox service group) mount the external drive. See steps below:

Step 1: Shutdown the guest computer

Step 2: On the host computer, insert the external USB drive

Step 3: On the guest machine’s GUI panel, choose Settings, or click on “Machine > Settings

Step 4: Find the USB shown on the left navigation panel. … USB 2.0 (EHCI) Controller should be selected automatically (note: almost all USB 3.0 devices have backward compatibility with 2.0 (EHCI))

Step 5: If the user’s device hardware is a USB 3.0, choose that… otherwise, select 2.0 (EHCI)

Note: You can learn more information about your USB device on Linux by running the lsusb command


Step 6: On the right, users will see the “Add USB” button. Click the 2nd button to add the connected USB device

Step 7: Select the desired USB drive from the list (the device is usually called “Generic Mass Storage”)

Step 8: Select the device to mount it

Step 9: Turn on the guest machine and log in once the device is mounted

Users should see that the USB device is mounted and displayed on the guest machine’s desktop.

The USB drive should show automatically on the guest virtual machine, and users should have full control over their device.

Solution Number 3: How Do I Access The USB In Oracle VM Virtualbox Ubuntu?

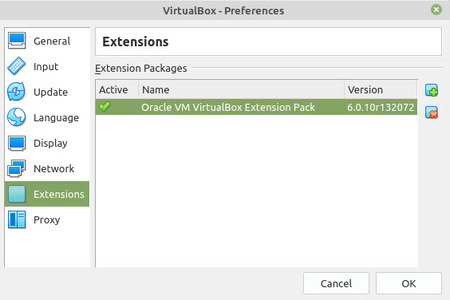
Step 1: Devs and VirtualBox users of all skill-levels should double-check to see if Extension Packs are already installed

Step 2: Open VirtualBox > Click File menu> “Preferences (Ctrl+G)” > the “Extensions” tab

open virtualbox

Step 3: If Extension Packs aren’t installed, visit: https://www.virtualbox.org/wiki/Downloads, and find the “Oracle VM VirtualBox Extension Pack”

Step 4: Download and install the Extension Pack to your desired folder

Please Note: Extension Packs and VirtualBox versions must be compatible. To find out what version of VirtualBox you have, simply click the Help, and then select “About VirtualBox


Step 5: Right-click Virtual Machine and then select “Settings (Ctrl+S)> Then navigate to the USB tab in the left-hand menu

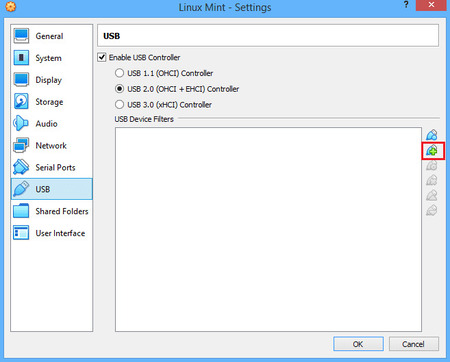
Step 6: Check the box beside “Enable USB Controller”

Step 7: Select USB 2.0 (EHCI) Controller, or USB 3.0 (xHCI) Controller (whatever is preferred)

Step 8: USB 1.1 (OHCI) is usually selected by default.

Step 9: Within the GUI, click the “Add USB” icon (shown below within a red square)

add usb

Step 10: Complete USB for VirtualBox setup

VirtualBox USB Linux access for all supported versions of Ubuntu

Enter terminal command (in VboxManage if you prefer):

“sudo adduser $USERNAME vboxusers”

Please note: Users must log out and back in for the command to take effect

VBox USB Ubuntu access for continuous device to VM connections

Step 1: After opening VirtualBox, navigate to the VMs Settings > USB

Step 2: Click the “USB+” icon

Step 3: Find and select your device from the list (this step adds Filter Spec to the list)

Repeat the step for as many devices as needed

USB devices should appear in the guest operating system upon VM startup. The device should either mount, request drivers, and so on (whatever is applicable for the specific operating system…)

Any mounted USB devices in the Guest OS won’t be accessible/available within the Host OS.

Steps for short-term/temporary USB device to VM connection

Step 1: After connecting the USB device, wait for the device to activate on the Host machine

Step 2: Start or navigate to Virtual Machine(VM)

Step 3.1: From the VM Status Bar (at the bottom of the screen), right-click the USB icon

Or…

Step 3.2: From the Menu, navigate as follows: Devices > USB Devices > then choose your device

USB devices usually appear within the Guest operating system either requesting drivers, showing as mounted, so on and so forth (whatever is typical for the specific operating system.)

logo USB Network Gate
#1 at Networking
USB Network Gate
Share USB over Ethernet on Windows
4.7 rank based on 372 + users