Hyper-V Enhanced Sessions Linux
The Remote Desktop feature of Windows guest OS makes it simple to enable a Hyper-V enhanced session. This is not the case for Linux distros running as the guest OS on Hyper-V as removed desktops are not configured by default. Ubuntu 20.04 LTS is a popular choice when deploying Hyper-V virtual machines.
Use the following procedure to configure a Hyper V Ubuntu enhanced session when running on a Windows host.
Here are some steps you need to take to work with an enhanced session Linux.
Create The Virtual Machine (VM)
Step 1: Open “Hyper-V Manager”, and click “New” (which is found on the right panel)
Step 2: Select “Virtual Machine”

Step 3: Once a new window pops up, create a name (of your choice) for the Virtual Machine
Step 4: Click “Next” once a name is chosen

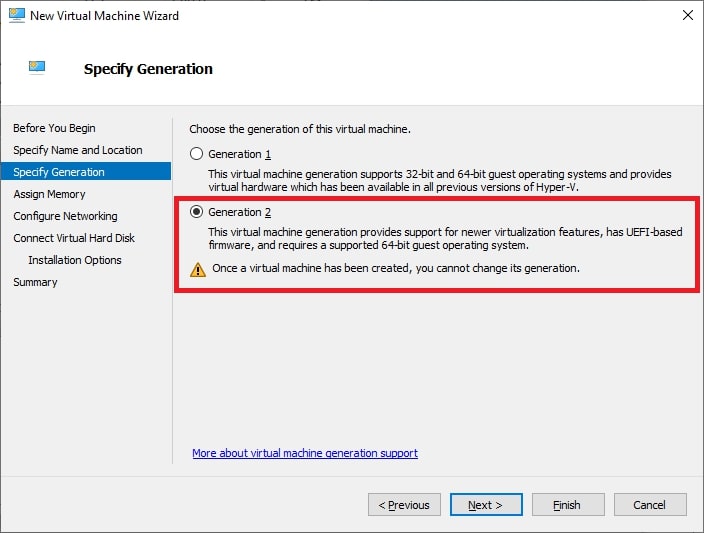
Step 5: On the next page that appears, ensure UEFI is enabled by selecting: “Generation 2”
Step 6: Once enabled, click “Next”.
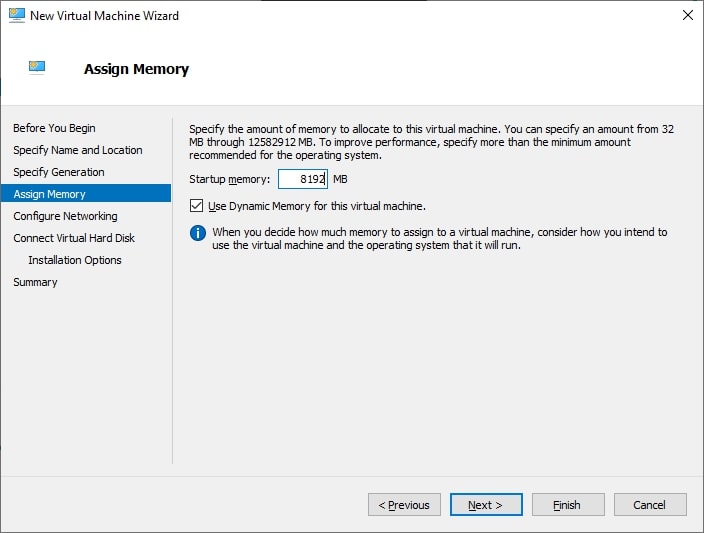
Step 7: Decide on your “Startup Memory allocations”. It is recommended to use up to 8 GB of memory to ensure the user-experience is efficient and enjoyable. However, a minimum of 4 GB is required.
Step 8: Click “Next”
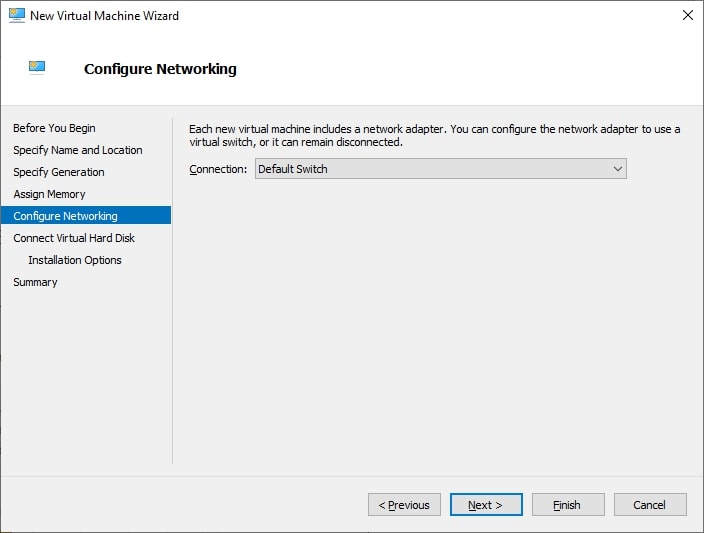
Step 9: After choosing at least one network interface (which allows Ubuntu to download updates -and/or drivers- during installation)... Click “Next”
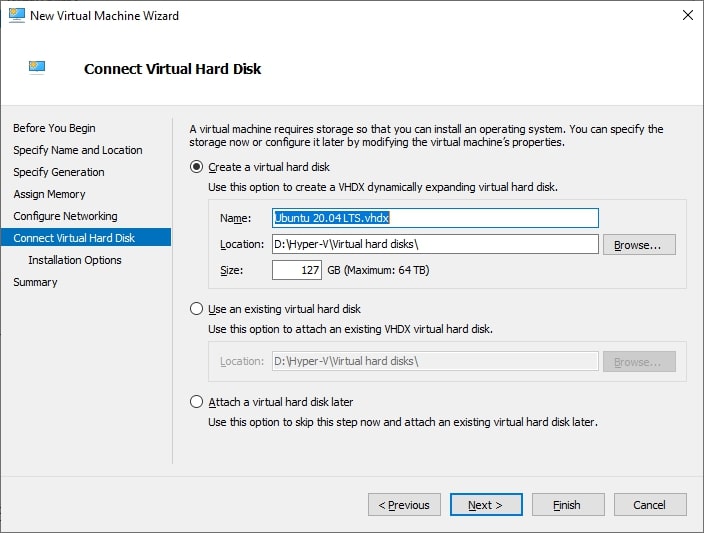
Step 10: Decide on your preferred disk size (the installation wizard defaults at a 127 GB disk), then click “Next”
Step 11: Choose the ISO downloaded from the Ubuntu website
Step 12: Click “Finish”


Disabling Secure Boot
Because Ubuntu cannot support “Secure Boot”, it will need to be disabled prior to starting up a VM. Follow the steps below to disable “Secure Boot”:
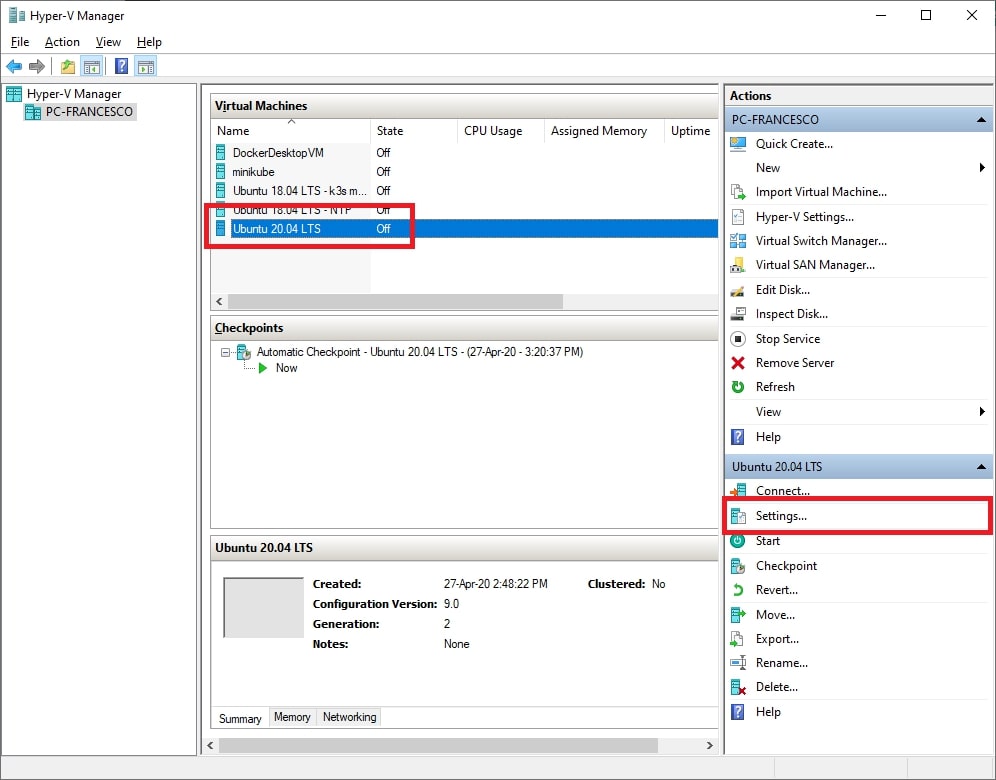
Step 1: After choosing the desired VM, click “Settings” (located on the right-side panel as shown below)
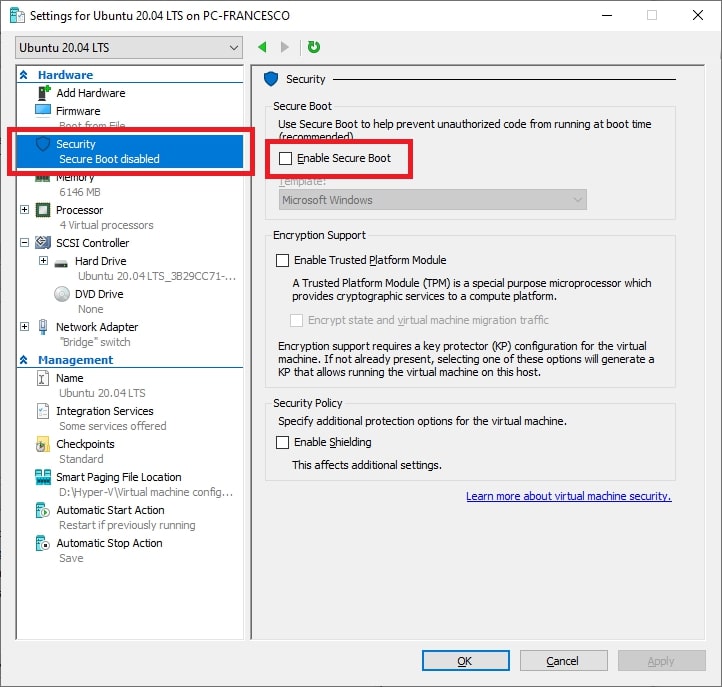
Step 2: Click “Security” (located in the left panel)
Step 3: Ensure “Enable secure boot” is left unchecked
Step 4: Click “OK”
Step 5: After making sure to select “don’t enable auto-login”, it’s time to start up the virtual machine and run the OS setup. If “don’t enable auto-login” isn’t configured, the enhanced session won’t function.
From there, it’s time to install the Microsoft-provided “linux-tools”.
Setting Up An Enhanced Session Linux - XRDP and XORGXRDP Installation
After Ubuntu boots successfully in the virtual machine you can configure a Hyper-v Ubuntu enhanced session. You need to install XRDP, which is the RDP server, and XORGXRDP.
Shell scripts are available for downloading and installing the components necessary for a Hyper-V enhanced session in Linux from a URL specific to the Linux version you are using.
https://raw.githubusercontent.com/Hinara/linux-vm-tools/ubuntu20-04/ubuntu/
For example, when using Ubuntu 20.04, use the following address.
https://raw.githubusercontent.com/Hinara/linux-vm-tools/ubuntu20-04/ubuntu/20.04/install.sh
Load and save the script to the installed web browser or use the command line and run wget. The script, install.sh, needs to be made executable with this command:
chmod +x install.sh
Now run the script:
sudo ./install.sh
A successful install of the Hyper-v Ubuntu enhanced session will restart Ubuntu.
If an error pops up after installing the script, open “/etc/xrdp/xrdp.ini (sudo required)” in your preferred editor.
Once “/etc/xrdp/xrdp.ini (sudo required)” is opened in the editor, edit or add the lines shown below:
port=vsock://-1:3389

use_vsock=false
Save the file and shutdown the VM
From Windows, open a PowerShell prompt with admin privileges and type:
Set-VM-VMName <your_vm_name>-EnhancedSessionTransportType HvSocket
The “<your_vm_name>” = the name of the desired Virtual Machine (the name that was created during the “Create The Virtual Machine” section)
Start up the virtual machine, and you’ll be quickly redirected to the XRDP login screen
