Submit your email address to get a link for quick download on your desktop and get started!
When you try to work with USB on VirtualBox you may face the problem. It may be solved in couple of simple steps. Below, we’ll describe how to access USB drive in VirtualBox step-by-step.
Keep reading to know more about how utilizing USB drive VirtualBox passthrough is a convenient and effective way to enjoy full access to USB storage devices.
Setting up the USB drive VirtualBox passthrough is actually quite simple. All that’s required is configuring settings within the virtual machine (VM), and installing drivers.
Step 1: Log onto Windows 10 to begin the USB Drive VirtualBox passthrough process
Step 2: On the host machine (sometimes referred to as the “server”), plug the USB storage drive into either a 2.0, or 3.0 USB port
Step 3: Now start Oracle VM VirtualBox
Step 4: From the guest operating system (sometimes referred to as the “client”), locate and shutdown the virtual machine from Oracle VM VirtualBox
Step 5: Access the drop-down menu by clicking the desired virtual machine
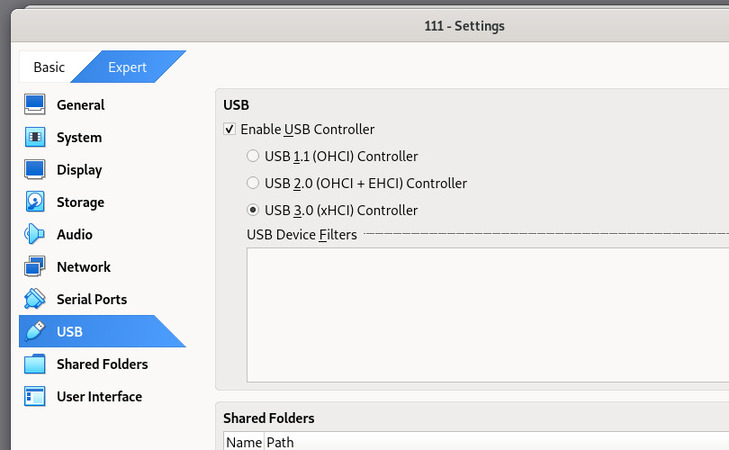
Step 6: Select “Settings” and then click “USB”
Step 1: Click “Enable USB Controller”
Step 2: Select USB 2.0 (EHCI). To utilize USB 2.0, users must install the Oracle VM VirtualBox extension .
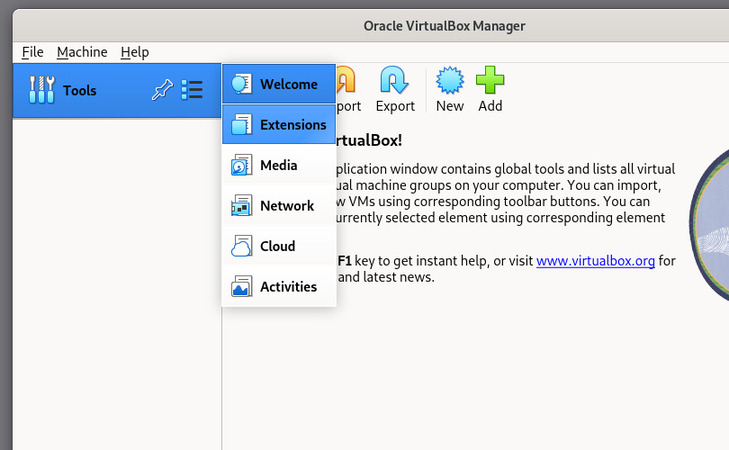
Step 3: To start the virtual machine, install the Extension Pack that can be found on the VirtualBox download website
Or...
disable the 2.0/3.0 USB ports
Step 1: Open an internet browser (any browser is fine), and visit the official VirtualBox website
Step 2: Download the 10 MB VirtualBox 6.1.4 Extension Pack (named: “Oracle_VM_VirtualBox_Extension_Pack-6.1.4”)
Please note: Extension Pack and Oracle VM VirtualBox versions MUST be compatible with each other. This is because Extension Packs enhance VirtualBox functionality, and contain software that could pose a risk to a computer that isn’t compatible. Carefully read the download description, and only download the Extension Pack from trusted sources.
Extension Packs support includes: 2.0 and 3.0 USB devices, NVMe, Disk Encryption, VirtualBox RDP, as well as Intel Card PXE Boots
Step 3: Locate and install the installation file
Step 4: After thoroughly reading and understanding VirtualBox’s license agreement, click “I Agree” to continue
Step 5: To confirm the Extension Package installation, click “Yes” ( individuals must use accounts with Administrative permission )
Step 6: A confirmation window will pop-up reading: “ The extension pack Oracle VM VirtualBox Extension Pack was installed successfully ”. When this window appears, click “OK”
Step 7: Open the virtual machine list and click the Start Button ( or do as follows: Right click the virtual machine > “Start”> “Normal Start” )
Step 8: Right-click the desired virtual machine and select “Settings”
Step 9: Click the USB
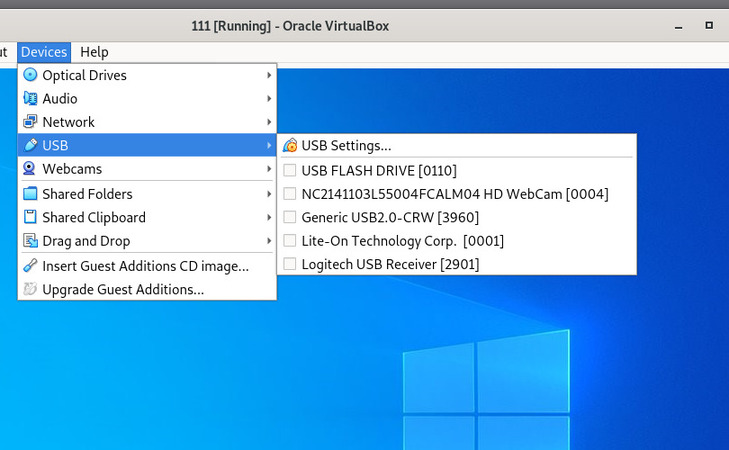
Step 10: Click the button located to the right (hovering the mouse over the button will show new USB filter values that are configured with the values of the (chosen) USB device that is connected to the host computer)
Step 11: Select the USB drive (in this example, a “JetFlash Mass Storage Device (1100)” is used)
Step 12: After selecting the USB drive from the USB list, click “OK”
Step 13: Once logged into the guest OS (AKA the virtual machine), open the File Explorer. This is done by holding down the “Windows Logo” key and pressing the “E” key
Step 14: Verify that the USB drive is an available and accessible storage device, and the data within can be transferred in and out